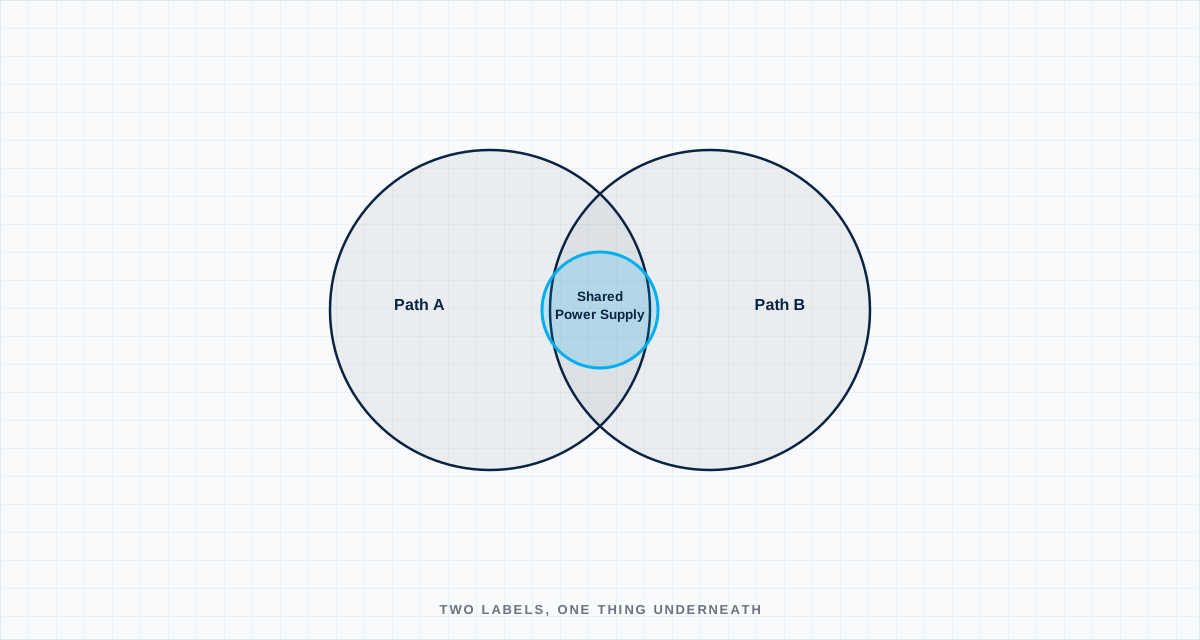
Redundancy is one of the most trusted words in a safety architecture, and one of the most frequently mis-applied. A system with two sensors, two communication paths, or two control channels gets labeled redundant, satisfies a functional safety requirement on paper, and still fails as a single unit in the field — because the redundancy that mattered on the architecture diagram wasn't actually present in the p-in-redundant-systems.svg)
Redundancy is a claim about independence, not duplication
Two of something is not redundancy unless the two instances can fail independently of each other. A dual-channel sensor system that shares a single power supply rail has two sensing paths and one failure mode that takes both of them out simultaneously. Two microcontrollers running supposedly independent safety monitors, both fed by the same clock source or the same voltage regulator, are not independent in the specific way that matters for a common-cause failure analysis, even though they're physically two separate chips running two separate pieces of firmware.
This gap between "architecturally redundant" and "actually independent" is where a meaningful fraction of safety-relevant failures originate, and it's specifically dangerous because it's invisible on a block diagram that shows two parallel paths without showing the shared infrastructure underneath both of them.
Where this shows up in integrated power electronics
The pattern recurs specifically in compact, integrated designs — a 6-in-1 power electronics unit combining multiple functions in a shared enclosure is exactly the kind of design where physical integration pressure pushes toward sharing infrastructure (a single low-voltage power supply feeding multiple subsystems' control circuitry, a single connector carrying signals for functions that are supposed to be independently safety-rated) that a set of physically separate boxes would never have shared in the first place. The same integration that saves cost and space on the bill of materials can quietly erode the independence a safety case depends on, unless that trade-off is deliberately evaluated rather than an incidental side effect of a packaging decision made by a different team for different reasons.
Why this is hard to catch in review
A common-cause failure analysis requires tracing every shared resource — power, ground, clock, communication bus, physical mounting, thermal path — behind every claimed independent channel, and that tracing has to go past the block diagram level into the actual schematic and physical layout. A review that stops at the architecture diagram, where two channels are drawn as two boxes with two arrows, will not surface a shared voltage regulator buried three levels down in the actual implementation. This is exactly the kind of finding that requires someone to deliberately go looking for it, because nothing about a passing functional test or a clean-looking architecture diagram will surface it on its own.
What to actually check
For any system claiming redundancy as part of its safety argument, the specific question worth asking explicitly, for every shared resource category, is: "if this specific component fails, does it take out more than one of my supposedly independent channels?" Power supplies, clock sources, connectors, and firmware update mechanisms are the most common places the answer turns out to be yes, and they're also the most common places where a design team, focused on the primary function of each channel, never explicitly asked the question at all.
Define the boundary
Name the operating state, interfaces, tolerances and degraded conditions. A test without a boundary only proves the sample survived once.
Capture the right signal
Choose measurements fast and close enough to the mechanism to explain cause, sequence and margin—not just the final alarm.
Set a decision rule
Agree before the test what passes, what triggers redesign and what uncertainty requires another experiment.
Turn the lesson into a validation plan.
Bring us the requirement, failure signature or architecture boundary. We will help frame the evidence needed to make the next decision.